April 2004
After I got the lathe painted & put together, it was time to get it
running. Though Gizmo came with a motor, it turned out the motor
had some corrosion issues and other problems. So I ordered a new
3/4 horse motor and a new belt from McMasters.
With the motor installed, I chose a new location for the power
switch. Gizmo came with the traditional long arm which bolts onto
the bed just below the back side of the headstock, reaching up &
over to the right, putting the switch high over the middle of the
bed. I opted for a more compact installation, mounting the
switch just to the right of the backgear lever on top of the headstock
cover, as seen below. I mounted the box by drilling and tapping
two 10-32 holes in the left-hand gear cover to match existing holes in
the switch housing, then installed 2 stainless screws. It turns
out to be a convenient setup & I'm very pleased with it.

As I worked up the motor & belts, 4 teeth broke off the first idler
gear on the gearbox's banjo bar. All I was doing at the time was
loading down the leadscrew a bit by resisting the apron travel.
My theory is the teeth were already cracked... I got a
replacement from Meridian Machinery,
which ended up being a nice cut gear rather than the cast one I
had. With the new gear in place, the entire geartrain has been
trouble-free ever since, and lots quieter.
June 2004
The next step was to acquire tooling. I raided my Atlas's parts
box and stole the center drills & tool bits, which was a
start. But for the chuck, I ordered a 2-1/4 x 8 backplate &
cheapie import 6" 3 jaw from Enco. Since I'm a newbie at this, I
figured I could mess up without it costing too much. As it turns
out, its a nice enough chuck, but I'm going to find a name brand 4 jaw
when I get to it. A good friend of mine is Polish, so perhaps
I'll get a Bison...
I got the backplate shoulder to within ~.001 on the 2nd try. The
first try I
cut .003 too much... oops, but the backplate is thick enough for at
least 3 tries, doubtless more if you know what you're
doing. I'm really impressed by how big a cut I can take
with the 10L- its vastly stiffer than my Atlas 6", and having a gearbox
instead of swapping gears around is just great. And thats even
before talking about the power cross-feed!

I tried a variety of neato techniques to measure where things were
going to be on the backplate, but it turns out all that fooling around
wasn't necessary. I ultimately did it by setting up a deep enough
shoulder and cut to about .003 over the shoulder diameter given by the
chuck datasheet. Then I switched to a mill file and fine
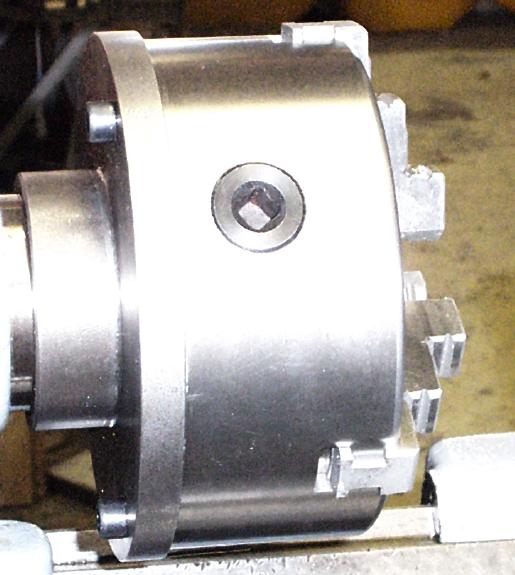
sandpaper to finish the cut and deburr. The datasheet also
provided the distance from the shoulder to the circle where the
mounting bolt holes should be located, so I located to that diameter
and used a threading tool to make a shallow cut, forming the circle-
seen above as the cut about half-way out from the shoulder. I
centerpunched one point on it for one bolt, then with the computed
length of the chords between the chuck's mounting bolts, I located
& punched the other 2 points. Happily, the math, datasheet
and practice all agreed. I drilled the mounting holes about .010
oversize and mounted the chuck, which went on nice and snug.
Runout is
somewhere between .001 and .003 as best as I can figure it. I
neglected to countersink the capscrew heads, but decided its better
this way because the bolt heads might allow me to use a prybar to
unscrew the chuck if its ever really stuck on the spindle. It
seems that setting up the backplate for a chuck without a datasheet may
be a tougher problem. I tried to measure the various
distances myself, but I was unable to duplicate the datasheet values-
its easy to get within .015 or so, but I was unable to do much better
than that- even when I knew what the right measurements were. I
need more practice & perhaps more appropriate tools.
I discovered I don't like the cheapie clone toolpost very
much.
Its stiff and locks up OK, but the wedge threads & locking arm bind
and have
a great deal of backlash. And more importantly, when I loosen the
mounting bolt on the the toolpost, the center column tends to unscrew
from the toolpost body, even after careful tightening. Its
not that big a deal I guess, just annoying. I'm definitely going
to
upgrade to a Aloris toolpost at some point, mine is a no-name unit
I got off ebay.
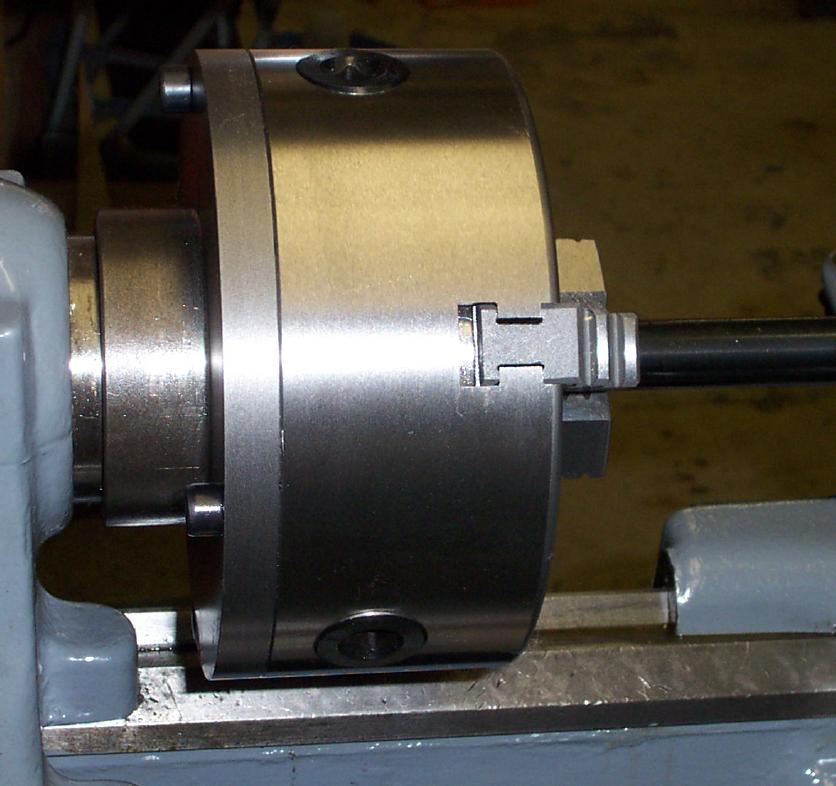
The shot below is a closeup of the mounted chuck, before I reduced the
backplate's diameter to match;
And afterwards,
(home)